Pinsa recipe is one of those hidden jewels that Italian cuisine reveals only to its most accurate connoisseurs.
As a matter of fact, every time I go to Rome I try to find the time for one pinsa, actually one of my favorite examples of street food.
Taking advantage of this period of lock-down, I have decided to experiment a lot with this kind of ancient pizza. After a bunch of attempts with different pinsa recipes, I believe I found the proper procedure and some useful tips I want to share with you.
If you don’t know about pinsa and you find this post useful.. just PIN IT 🙂
What is pinsa?
Pinsa is a word that comes from the Latin pinsere (to press, to spread out) and this suggests the fact that it is pressed with the hands until obtaining an oval shape.
It is an amazing ancient recipe: you can find the word pinsa in the Aeneid by Virgil, more than 2000 years ago!
Originally, this recipe was very common among the lower classes, typically farmers. Using cereals, mainly millet, barley and spelt, they were able to cook this wonderful kind of focaccia (hey, did you check my easy focaccia recipe?? 🙂 ) It was poor food, so even if today, especially in Rome, you will find it topped with any sort of ingredients, originally pinsa recipe had very simple ingredients: olive oil, salt, rosemary, and other aromatic herbs.
Since 2007-2008, this ancient pizza recipe has experienced increasing success in our Country, and nowadays more than 5000 shops (pinserie) are specialized in this amazing street food.
Difference between pinsa and pizza
As I have highlighted in a previous post about (some of) the many different types of focaccia, this ancient pizza recipe has some remarkable and distinguishing features:
- light and very easy to digest, thanks to long, double leavening.
- Crumble, crunchy on the borders, soft on the inside.
- A special flour mix, that is nowadays almost generally agreed upon: wheat, soy, rice. (Note: regarding this point, I have experimented a little bit and I want to share with you some findings, below).
- Oval shape, different from the usual circle shape, or the rectangular one of the pan pizza (pizza in teglia).
What I have understood, after a bunch of attempts mixing different types of flour, in slightly different ratios, is:
- the rice flour is the crucial ingredient. It gives to the pinsa, in particular to the crust, a texture hard to define but that you will immediately learn to recognize as soon as you will try it. It is not only part of the dough, but also the flour you will use on your countertop to shape it before cooking: don’t be shy, abound with it! Additional tip: if you are not used to this kind of flour, start using it also to prepare vegetables fried in batter… rice flour makes wonders.
- I have tried a few times using spelt flour instead of soy flour, mostly because… soy was not present in ancient Rome, so there must have been an alternative! I found out that spelt can be a great alternative, even if soy is great (thanks to the high protein ratio).
How to enjoy a pinsa
Finally, few notes about how to properly enjoy your pinsa.
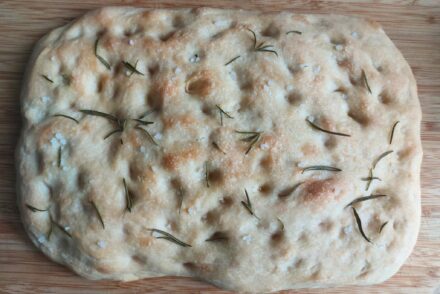
If you want the simplest pinsa, just add a little bit of olive oil, some sea salt and rosemary, before cooking.
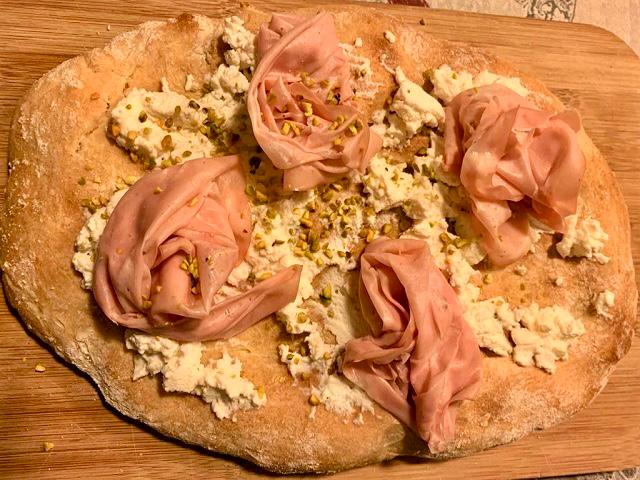
Otherwise, you can skip salt, oil and rosemary, but add mortadella, pistachios and ricotta cheese (like in the picture of this post), after the oven.
Another amazing version I’ve tried (topping before the oven) is guanciale (or bacon), thin slices of apple, grated pecorino cheese. Absolutely yummy!
But not it’s time to get things done. Since ancient pizza recipe requires a long preparation… you’ll have to start at least the day before!
Pinsa recipe
Equipment
- a bowl
- a mixer (optional)
- a spoon
Ingredients
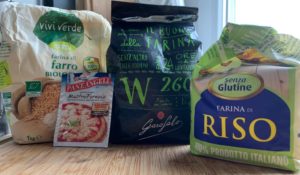
- 630 gr wheat flour
- 40 gr rice flour
- 30 gr spelt (or soy) flour
- 500 gr water cold
- 2 gr dehydrated brewer's yeast If you use the fresh one, about 6-7 grams
- 10 gr sea salt for the dough
- 10 gr extra virgin olive oil for the dough
- q.s. sea salt topping (if no other ingredients on top)
- q.s. rosemary topping (if no other ingredients on top)
Instructions
- Prepare the ingredients. The water should be cold.

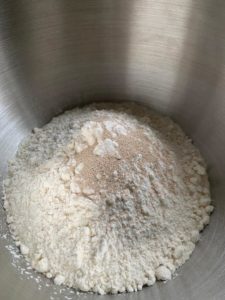
- Mix the different types of flour and the yeast.

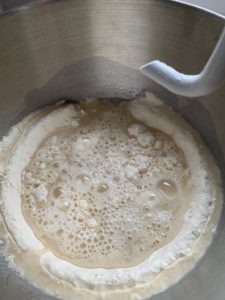
- Add 80% of the water and go on mixing for about 5 minutes.

- Add the salt, the oil and the remaining water, and mix for about 20 minutes, until the dough looks smooth.

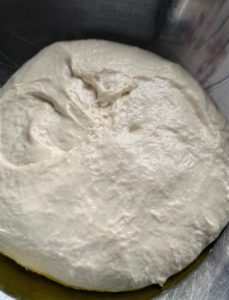
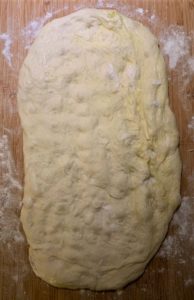
- Put the dough into a bowl with a cover (or seal it with a plastic film) and then into the fridge, for at least 24 hours. It should like this:

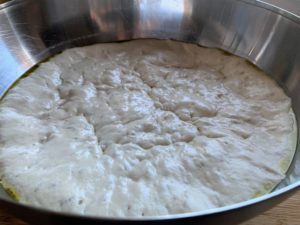
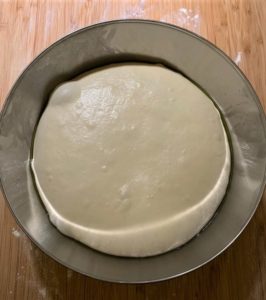
- Now create 2 or 3 smaller doughs. Put each of them in a bowl and cover it with a cloth, for the second leavening, at ambient temperature, lasting 3 hours. Result should be like this:

- After the second leavening, turn on the oven, with the pan inside, at 250 °C. When it's hot, shower the countertop with a fist of rice flour and gently press the dough on it, to shape it.

- Then put it on the hot pan and into the oven. Lower it at 200 °C. Cook it for 15-20 minutes and … it's done! Buon appetito.
Notes
- pinsa takes time, but you will be rewarded
- the first leavening is cold, so please use cold water
- topping is fun, but I always suggest to use ingredients that are part of our tradition 🙂
- the rice flour is key, when you work it before the oven just use a lot of it and you will not regret!
Disclosure
Some of the links above are affiliate links. This means that, at no additional cost to you, if you click through and make a purchase you will help this blog grow. I only promote affiliate programs that I believe in, and products I know about, with the aim to help you in your choices.
Buon appetito!

15 Comments
Hi is the soy flour the same as soya flour? Thanks
yes, I think we can use both words to express flour from soy beans, correct?
Thanks for visiting my blog, Roberto 🙂
Hello, what does qs mean in your measurements. For the yeast – how do we know how much to add?
Thank you 😀
Thanks for highlighting a mistake! In general, qs is “quantum sufficit”, a Latin expression used to express “good enough” quantities, or “according to taste” (e.g., sugar on top of a cake). Here no, there’s a recommended amount, that I added (2 grams). Thanks again, Roberto
Its good to mention is that wheet flower must be strong, rich with protein, for 24-48h fridge. For example Caputo Manitoba.
hi Damian, thanks for pointing this out. I agree, let’s say a 12-13% in protein is perfect, and a common flour here in Italy. Enjoy, Roberto
To confirm, the wheat flour you use is all-purpose flour, not whole wheat flour. Is that correct?
Yes Marie, definitely! Wish you good pinsas 🙂
Thank you so much for giving the world this recipe. This is exactly like the pinsa I’ve had from an Italian bistro with a focus on food from Naples. I’m so happy I found your post. I made it exactly as written and let the dough sit for two days in the fridge before the second leavening. Divine.
very glad you tried it and were satisfied! Pinsa is one of my signature recipes, even if sooo bad in pictures it tastes sooo great 😀
What brand of beer yeast do you use?
hi Lucretia and thanks for visiting my site! I recommend only things I know and use. I often use “Molino Spadoni” dried beer yeast, about 40% of the recommended quantity (let’s say, 2-3 gr for 500 gr flour). I checked online for you, and I don’t think you can get it. Btw, I realized that in the US you can find maybe the best flour and beer yeast from Naples, which is Caputo. Here is the link to the yeast: https://amzn.to/3KUrgeb and to the flour for pizza 🙂 https://amzn.to/3u9qlQm – crazy quality! Hope this helps, ciao!
Ciao,
I will try it for sure.
Why didnät you use millet and/or barley four?
Dan
Glad you will try it! I am using a mix of flours that is currently the most widely used, even if percentages are well-kept secrets by the most famous pinserie 🙂 But barley sounds not a bad idea at all, why not! Ciao, Roberto
Delicious 😋